When uploading data from Collage Web or Collage Office, new data layers are automatically created.
Optionally, the user can also create projects when publishing data from Collage Office, containing the uploaded layers. Please refer to Collage Office documentation.
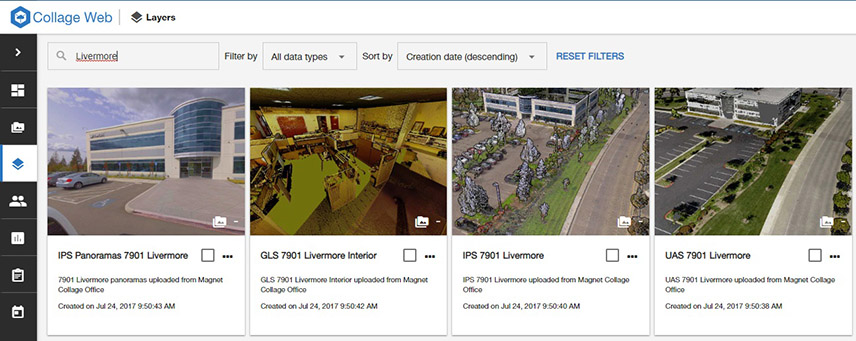
In the Collage Web application, users can list all published layers and projects, and also create new projects and vector feature layers.
This page can be accessed by clicking on the Layers icon in the vertical application menu.
Note that, initially, layers and do not have thumbnails. These thumbnails can be created or updated by users in the Project Viewer.
The list of layers can be filtered by type (point clouds or vector layers), or by name (by typing at least three characters).

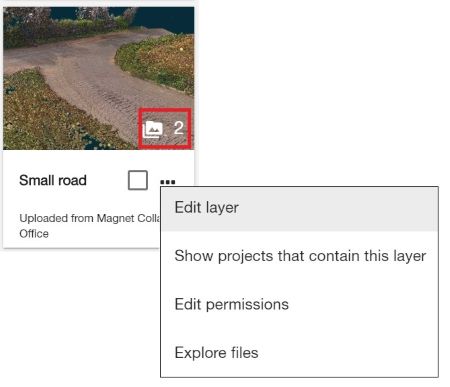
Using each layer's contextual menu (three dots icon), it is possible to edit the properties of the layer and change its permissions.
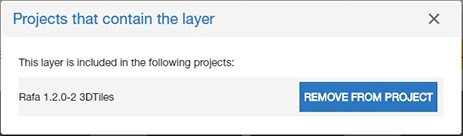
If a layer is used by one or more projects (the number of projects where the layer is added is shown on its thumbnail), the user can use a command in the same menu to see the project list.
In this dialog, it is possible to remove the layer from the projects where it has been added.
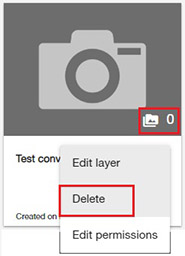
When a layer is not used in any project (the project counter is zero), then it can be removed using the "delete" command in its context menu. Note that the delete operation removes the layer data from the server and it is irreversible.
To delete multiple layers with project count equal to zero, select them by clicking on their thumbnails or checkbox, and use the Remove Selected Layers button at the bottom of the page.

The dialog to edit the layer properties allows the user to change the name and description of the layer, and assign it a coordinate reference system, if it was not assigned earlier.
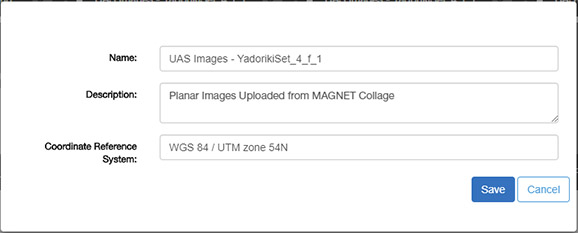
Note that it is not advisable to change the internal layer coordinate system if it already has one. Collage Web will not reproject the data to a different coordinate system.
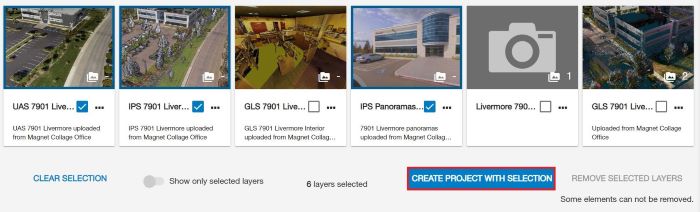
The Layers page offers a convenient way to create a project based on existing layers. To do so, first click on the layer thumbnails to select them. You can combine point clouds and feature layers from the same page or different pages in the layer list.
After the layers are selected, click on the "Create project with selection" button at the bottom of the page.
The Create project page will open. In this page the user can see the list of selected layers, as well as their coordinate systems.
The user needs to enter a name and a description to create the project.
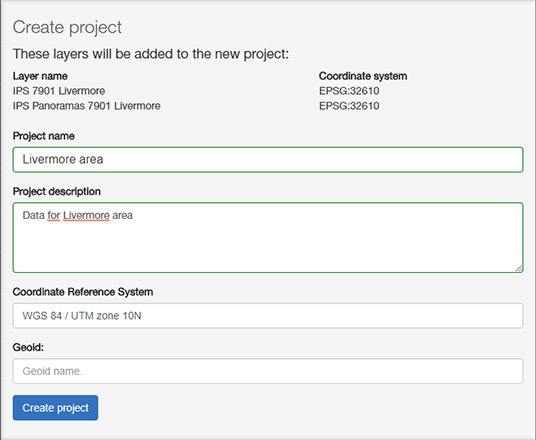
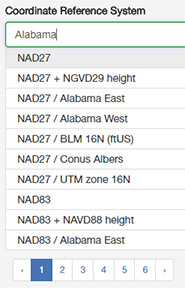
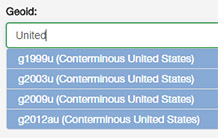
By default, the coordinate system (CRS) assigned to the project will be the first valid one from the layer list. The user can change this default CRS using the text field, which will provide suggestions matching full words written in the input box.
A geoid can also be selected to correct the elevation values, so they represent altitude above mean sea level.
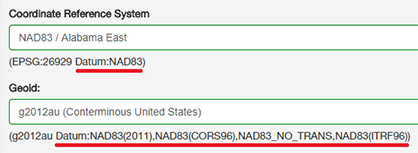
After selecting a CRS and/or geoid, their datums are displayed below the selection boxes, so the user can decide if they can be combined together.
Note that Collage Web does not re-project data on the fly for display in the Project Viewer. Instead, the data is always displayed in the layer's coordinate system exported from Collage Office (UTM). However, the project's CRS and geoid affect how coordinate values are displayed in the Information and Property panels, and how they are exported to files.
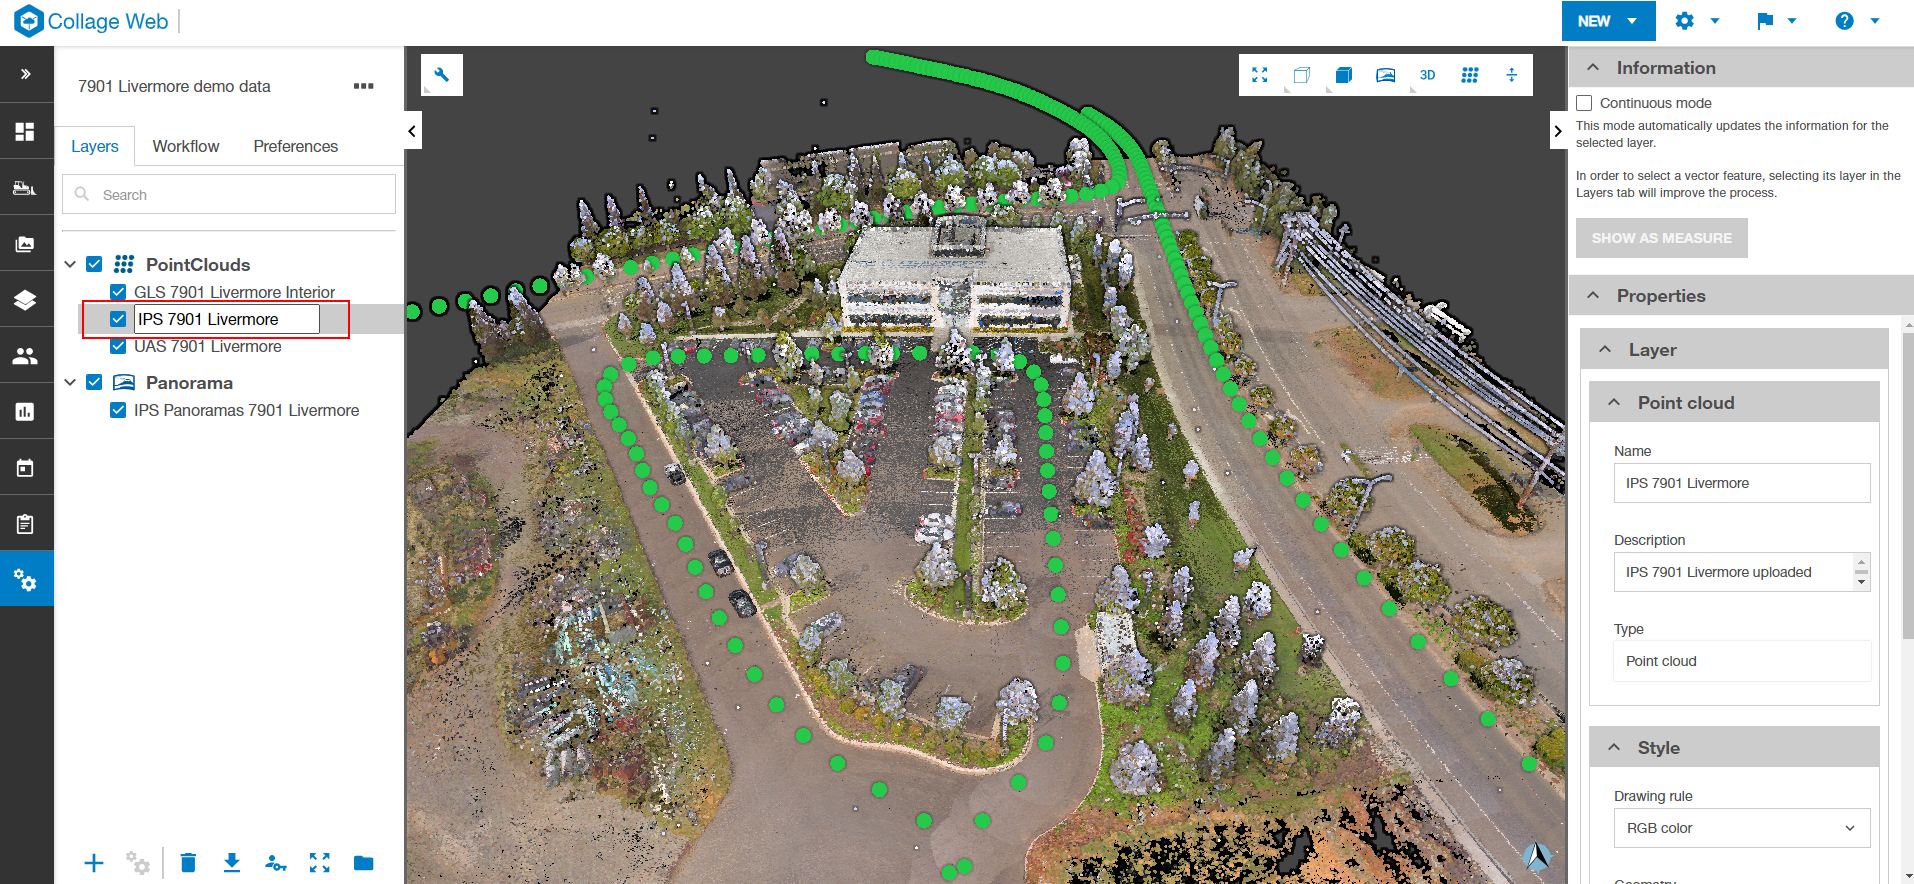
The names of the layers can be modified directly within the project to which they belong. By double-clicking on a layer's name, you can enable name editing. Any changes made will be reflected across all levels and will be saved automatically upon exiting the name editing mode.
This page can be accessed from the "Explore projects" button in the entry (dashboard) page or from the Projects icon in the application menu.
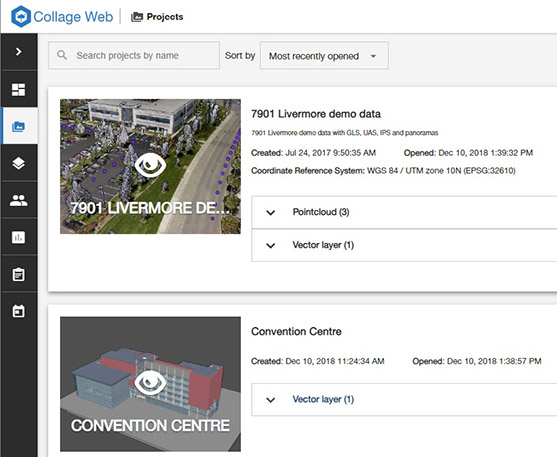
The user can see a summary of each project, including its name, description, projection and layers.
If the project has a thumbnail, it will be displayed in the summary. The user can create or update this thumbnail in the Project Viewer.
To open a project in the Project Viewer, just click on its name or thumbnail.
The project context menu contains commands to edit and delete the project:
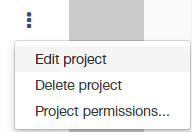
Project deletion does not remove any layers from Collage Cloud. Deleted projects can be easily recreated from layers.
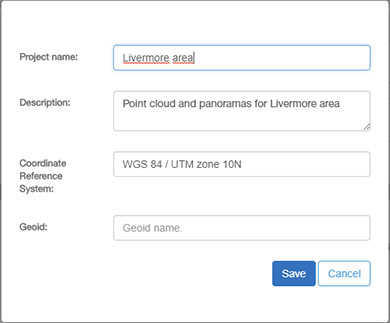
In the project editing form, the user can change the name, description and coordinate system. Please read the previous note about the meaning of the project CRS.
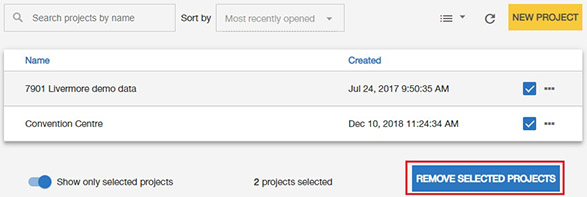
To delete multiple projects, select them with their selection checkbox and use the "Remove selected projects" button at the bottom of the page. The next image also shows the use of the List layout option and the toggle button to show only the selected projects.
Note: This beta function is provided with no charge and no warranty for quick preview of new features before official release. Please note that it may have less reliability relative to an official release version.
As project page, sites page can be accessed from the "Explore projects" button or from the Sites icon in the application menu.
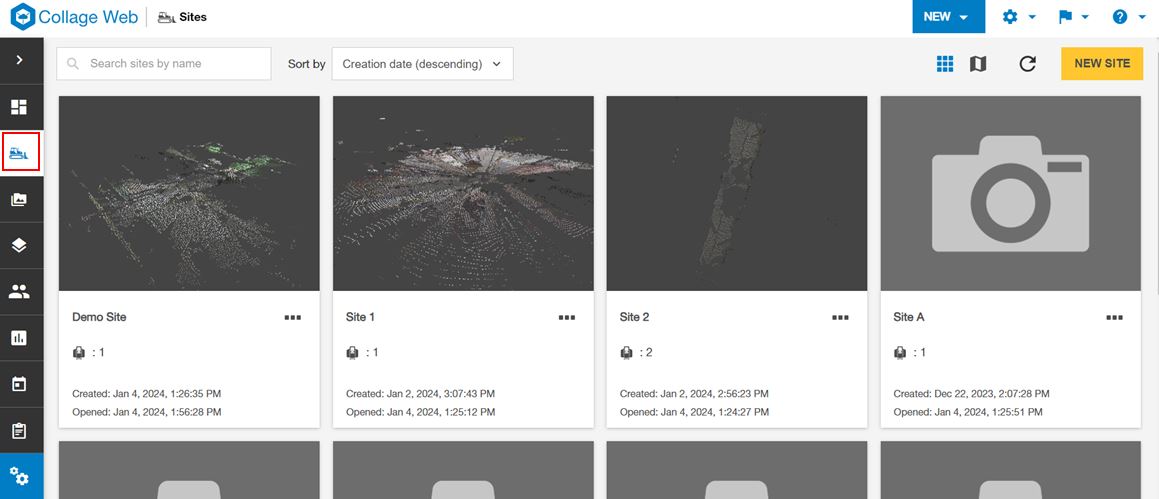
The user can see a summary of each site, including its name, description, projection, type and number of projects contained in it.
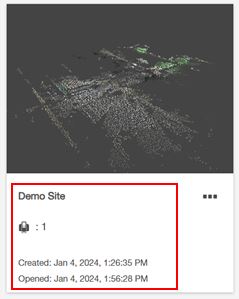
The thumbnail will be added automatically, it will be displayed in the summary. The user can update this thumbnail in the Site Viewer using screenshot tool.
To open a site, just click on its name or thumbnail.
The site context menu contains commands to edit and delete the site:
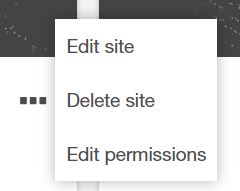
Site deletion does not remove any layers from Collage Cloud. Deleted sites can be easily recreated.
In the site editing form, the user can change the name, description, coordinate system, snapshot type and ground sample distance parameters.
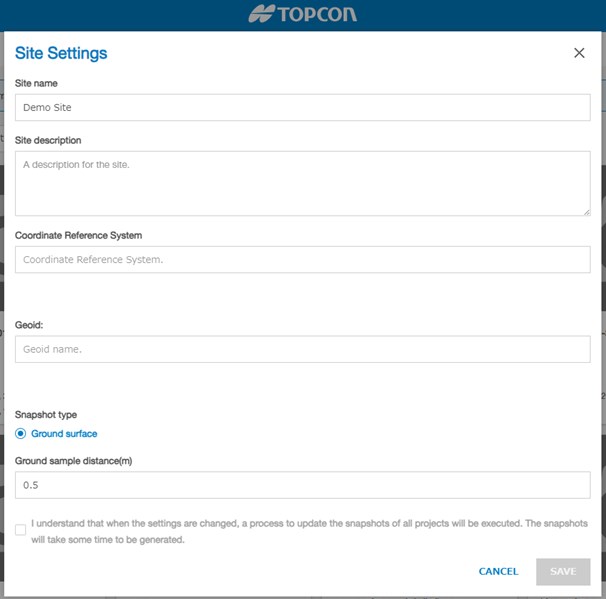
Note:Changing the configuration involves initiating a process to update the snapshot for all projects contained in the site.